

When customers ask us at Futrun how to get the most out of their parking heater, one of the first pieces of advice we share is regular cleaning. We've been in the diesel heater supply business for over a decade, and we've seen firsthand how a neglected unit can drain fuel, fail prematurely, or even leave you in a lurch on a cold morning. Cleaning isn't just about wiping dust off the outside-it's about maintaining the core components that keep your heater running efficiently, whether you're using a 12v unit for a campervan, a 24v model for a truck, or any of the diesel-fired heaters we offer. Today, we're breaking down the step-by-step process to clean your parking heater the right way, with tips we've tested on hundreds of units we've supplied.

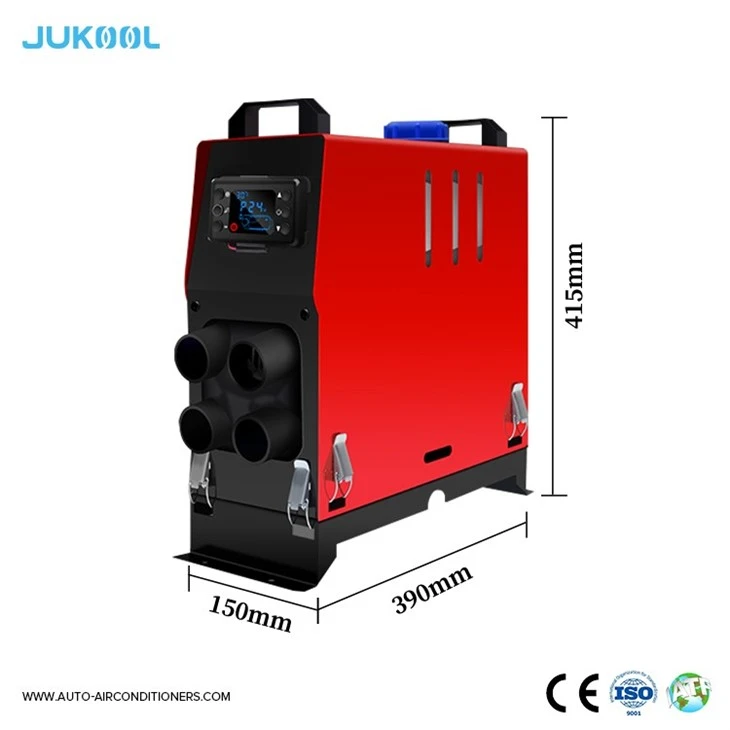
First, let's start with why cleaning matters. Parking heaters run on diesel, which leaves behind carbon deposits over time-just like your car engine, but in a much tighter, specialized system. These deposits clog the fuel nozzle, restrict airflow, and can even cause the combustion chamber to overheat. If you ignore this, you'll notice symptoms like reduced heat output, uneven running, or even error codes popping up on your heater's control panel. For anyone relying on their heater for long trips, cold camping nights, or truck rest stops, that's not a risk worth taking.
Before you get started, gather your supplies. You don't need anything fancy, but using the right tools will keep you safe and avoid damaging delicate parts. Here's what we recommend: a set of small screwdrivers (Phillips and flathead, for removing casing screws), a soft-bristled brush (like a small paintbrush or toothbrush for tight spots), isopropyl alcohol (at least 90% concentration, for dissolving carbon), a lint-free cloth, a small container for soaking parts, compressed air (on low setting, to blow out dust without bending components), and safety goggles and gloves-diesel and cleaning fluids can be messy and irritating. Also, make sure you're working in a well-ventilated area, away from any open flames or sparks. Even though diesel heaters are designed to burn fuel safely, working around flammable materials is never a good idea.
Now, let's walk through the cleaning process step by step. We'll assume you're cleaning a common parking heater model, but the basics apply to most units, whether it's a 12v night heater for campervans or a diesel-fired heater for trucks.
Step 1: Disconnect the heater from power and fuel. This is non-negotiable. For 12v units, unplug the power connector from the battery or vehicle's electrical system. For 24v models, double-check that the main power switch is off and the wiring is disconnected to avoid any accidental startup. Next, disconnect the fuel line-be prepared for a small amount of residual diesel to leak out, so have your cloth ready. If you're not sure how to access the fuel line, check your heater's manual, or if you're working with a unit we supply, you can reference our product pages like the 12v 8kw Diesel Heater For Rv Trucks for specs on your unit's layout.
Step 2: Remove the outer casing. Most parking heaters have a few small screws holding their plastic or metal casing in place. Use your small screwdriver to remove them, then gently pull the casing off-be careful not to yank on any attached wiring. Set the casing aside; we'll clean that separately later. Now you'll see the internal components: the combustion chamber, fuel pump, nozzle, and fan. This is where the bulk of the cleaning will happen.
Step 3: Clean the outer surfaces. Take your soft-bristled brush and gently brush away dust, dirt, and loose carbon from the outside of the combustion chamber, fan blades, and pump housing. For stubborn grime, lightly dampen your cloth with a little isopropyl alcohol and wipe-don't spray alcohol directly on the electronics, as this can cause damage. For areas that are hard to reach, use the compressed air on low to blow out dust, holding the can a few inches away so you don't bend any delicate parts.
Step 4: Clean the fuel nozzle and combustion chamber. This is the most critical part. The fuel nozzle is a small, tiny opening that can easily clog with carbon. Locate the nozzle-it's usually at the end of the fuel line leading into the combustion chamber. Carefully remove it (again, check your manual if you're unsure) and soak it in a small container of isopropyl alcohol for 10-15 minutes. While the nozzle soaks, use a toothpick (not a metal wire, which can scratch or damage the opening) to gently dislodge any carbon buildup around the nozzle's tip. For the combustion chamber, use the soft brush to scrub away black carbon deposits, then wipe it clean with a cloth dampened with isopropyl alcohol. If the carbon is very thick, you can let the chamber soak in a small amount of alcohol for a few minutes before scrubbing.
Step 5: Clean the fan and air intake. The fan is responsible for drawing air into the heater for combustion, so a dirty fan can reduce efficiency. Remove the fan cover (another set of small screws, usually) and gently lift the fan blade. Wipe each blade with a lint-free cloth dampened with alcohol, being careful not to bend the blades-even a slight bend can throw the fan off balance and cause noise or reduced airflow. The air intake filter, which is usually located near the fan, should also be cleaned. If it's a reusable filter, rinse it with water (let it dry completely before reinstalling) or wipe it with alcohol. If it's a disposable filter, now's a good time to replace it-we sell replacement filters for all our models, from the 24v Rv Diesel Heater to portable caravan models.
Step 6: Reassemble and test. Once all parts are clean and dry, start putting the heater back together. Make sure the fuel nozzle is securely attached, the fan blades are back in place, and the casing is tightened down. Reconnect the fuel line first, then the power. Before starting the heater, double-check all connections to ensure nothing is loose. Then, turn on the power and test the heater on a low setting. Listen for any unusual noises (like rattling from loose parts) and check that it's blowing heat evenly. If it runs smoothly, you're done! If not, double-check your connections or reach out to us for troubleshooting-we help customers with this all the time.
A few maintenance tips will keep your heater clean between deep cleans. Every few weeks, check the air intake and clean it if it's dusty. Before cold weather starts, do a full deep clean-this is especially important if you rely on your heater every night during the winter. For 12v night heaters for campervans, which are often used in dusty campgrounds, more frequent checks are a good idea. Also, make sure you're using the right diesel fuel-low-quality fuel has more impurities that lead to carbon buildup, so using clean, ultra-low-sulfur diesel will help keep your heater cleaner longer.
At our company, we've learned that a clean heater is a happy heater, and we want all our customers to get the longest life out of their units. Whether you're equipping a truck with Diesel Fired Heaters For Trucks, a campervan with a Portable Caravan Diesel Heater, or looking for a reliable 12v model, regular cleaning is one of the simplest ways to avoid costly repairs. If you're in the market for a new parking heater, or need replacement parts for the one you have, feel free to connect with us for more details. We're here to help you stay warm, no matter where your travels take you.


